Case Study
Mobile Application Development
React Native coursework exploring navigation, local persistence, API data, and Redux cart state through two apps: My Todo List and Fake Store.
Project summary
Two apps built across coursework milestones.
This case study covers two React Native mobile applications I built as part of Mobile Application Development coursework. The work moved from static screens into complete user flows with navigation, validation, local persistence, API integration, shared state, and shopping cart behaviour.
The important part of this project was not just making screens appear on a phone. I had to learn how data moves through a mobile app, how user actions should update state, and how to choose between simple local state, device storage, and a shared state library when the app becomes more complex.
- Project type: University coursework.
- Role: Sole developer.
- Tools: React Native, Expo, JavaScript, React Navigation, AsyncStorage, Redux Toolkit, Fake Store API, GitHub.
- Focus: Mobile app development, navigation, state management, API integration, and local persistence.
App 1
My Todo List
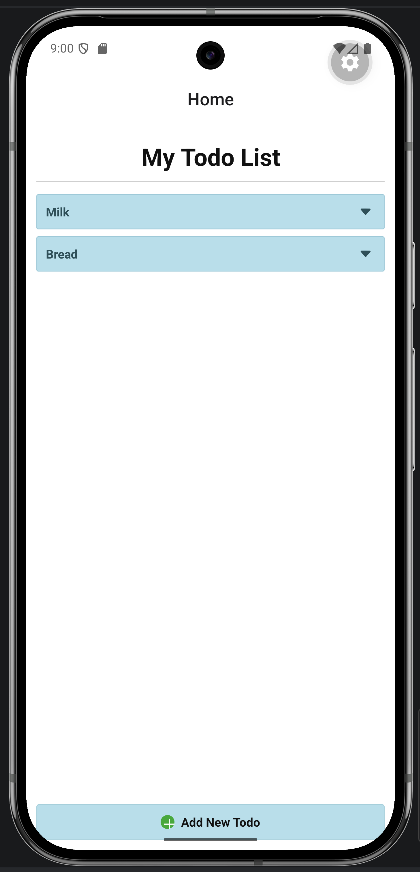
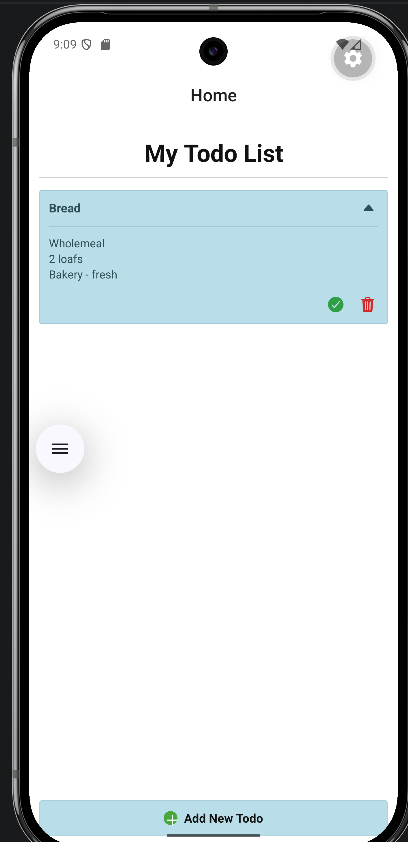
My Todo List was a task management app designed to let users create, view, expand, finish, delete, and persist todo items. It started from a simple home screen and became a fuller mobile flow with form input, validation, dynamic rendering, and local storage.
I built the full flow myself: the home screen, add-todo screen, validation behaviour, dynamic list rendering, finish/delete actions, expanded item view, and AsyncStorage persistence. That gave me a practical understanding of how a small app becomes easier to maintain when the main data flow is kept in one predictable place.
Todo goal and features
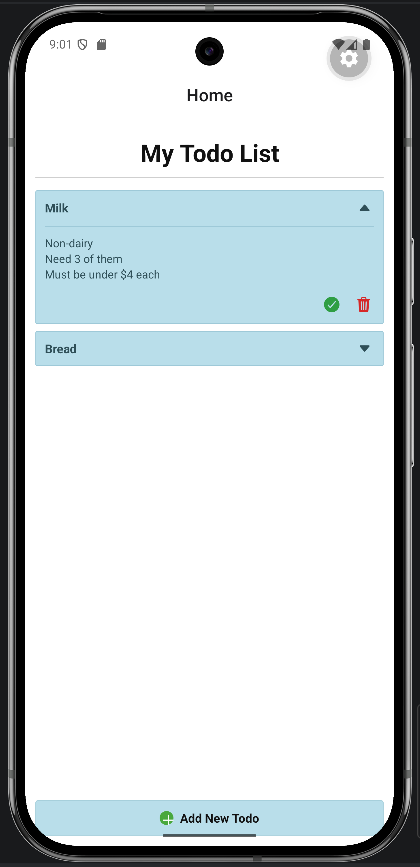
- Home screen displaying todo items.
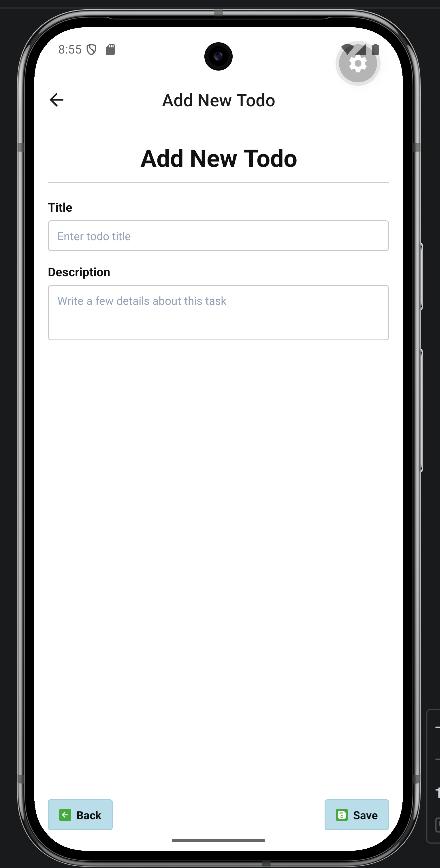
- Add New Todo screen with title and description inputs.
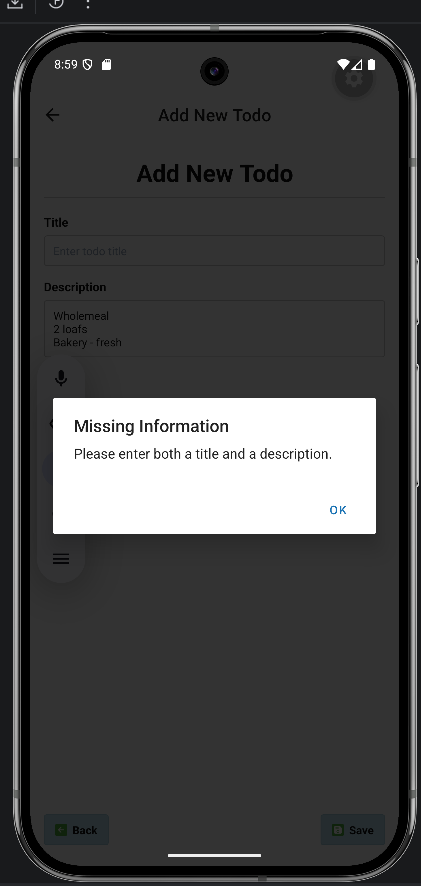
- Input validation and alert messages for missing information.
- Dynamic list rendering with FlatList.
- Expand/collapse behaviour for todo details.
- Finish and delete actions.
- AsyncStorage persistence so todos remain after closing and reopening the app.
Todo implementation
The app kept the main todo state in the root app component so the Home screen and Add New Todo screen shared the same live data. Action functions created todos, marked them finished, deleted them, and wrote the updated list to local storage.
AsyncStorage was a good fit because the app needed local persistence without unnecessary backend complexity. FlatList replaced hardcoded todo rows so the interface could render any number of todos.
This taught me the value of starting with the simplest state management that fits the problem. Redux would have been unnecessary for this app because the data flow was small enough to understand with lifted state and passed-in handlers. The challenge was keeping that simple structure tidy as features were added.
Todo screenshots
Overview, add flow, validation, and persistence.
App 2
Fake Store
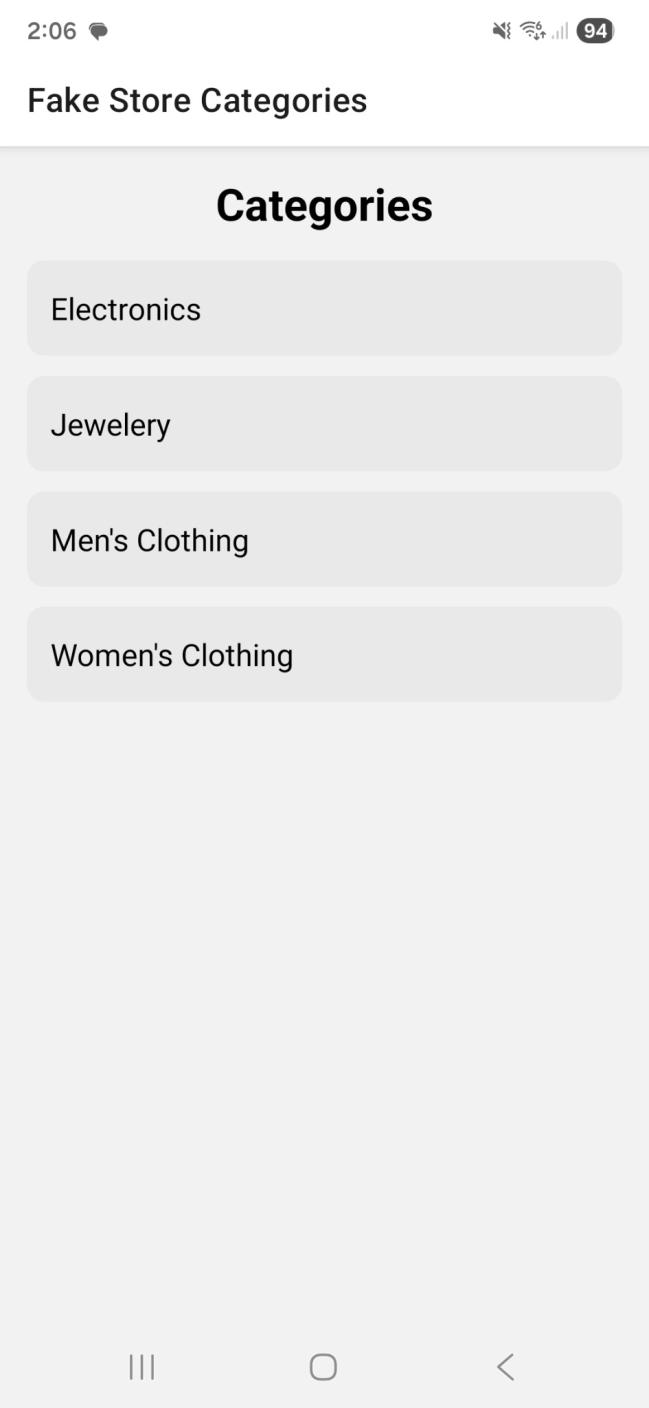
Fake Store was an ecommerce-style mobile app using the Fake Store API. It focused on category/product browsing, related screen navigation, and Redux Toolkit state management for shopping cart behaviour.
This app pushed me beyond simple local state. I had to connect remote data to screen navigation, handle loading and empty states, and keep cart behaviour consistent even when the user moved between product and cart screens.
Fake Store goal and features
- Category screen loading product categories from the Fake Store API.
- Product list screen for the selected category.
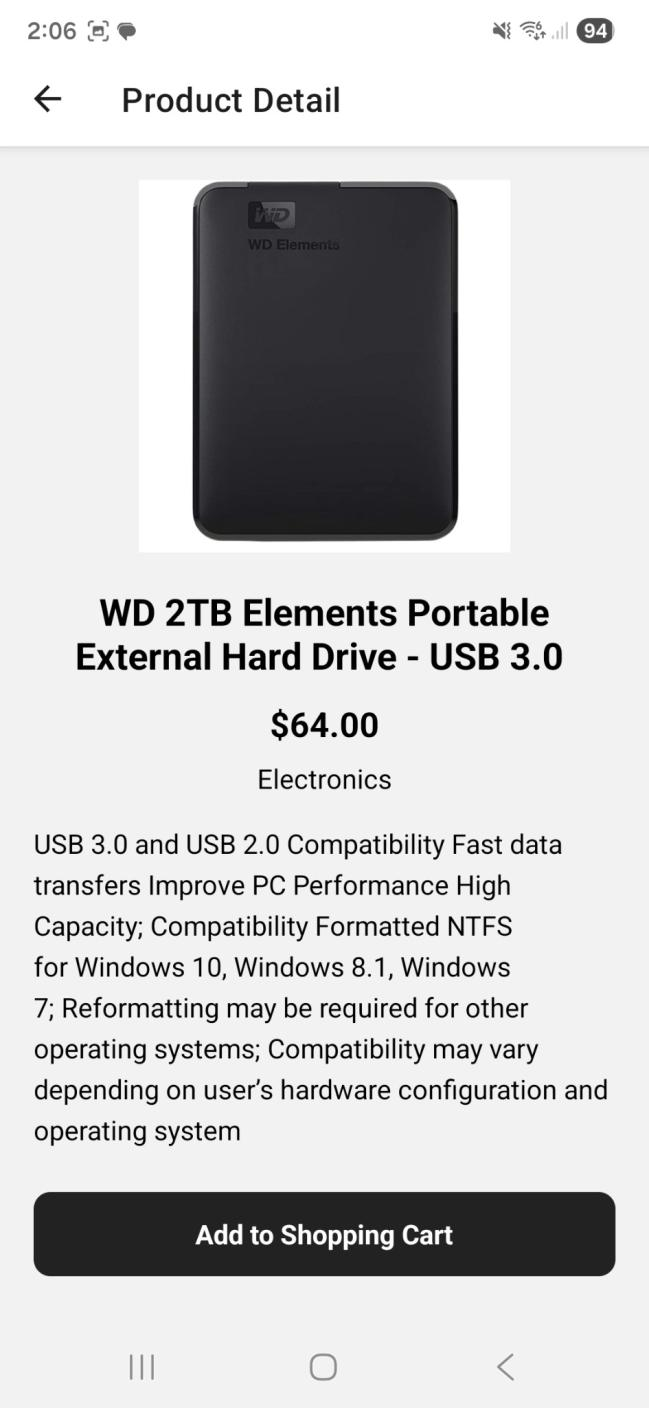
- Product detail screen with image, title, price, category, description, and add-to-cart action.
- Loading indicators and basic API error handling.
- Stack navigation for browsing and bottom tabs for products/cart sections.
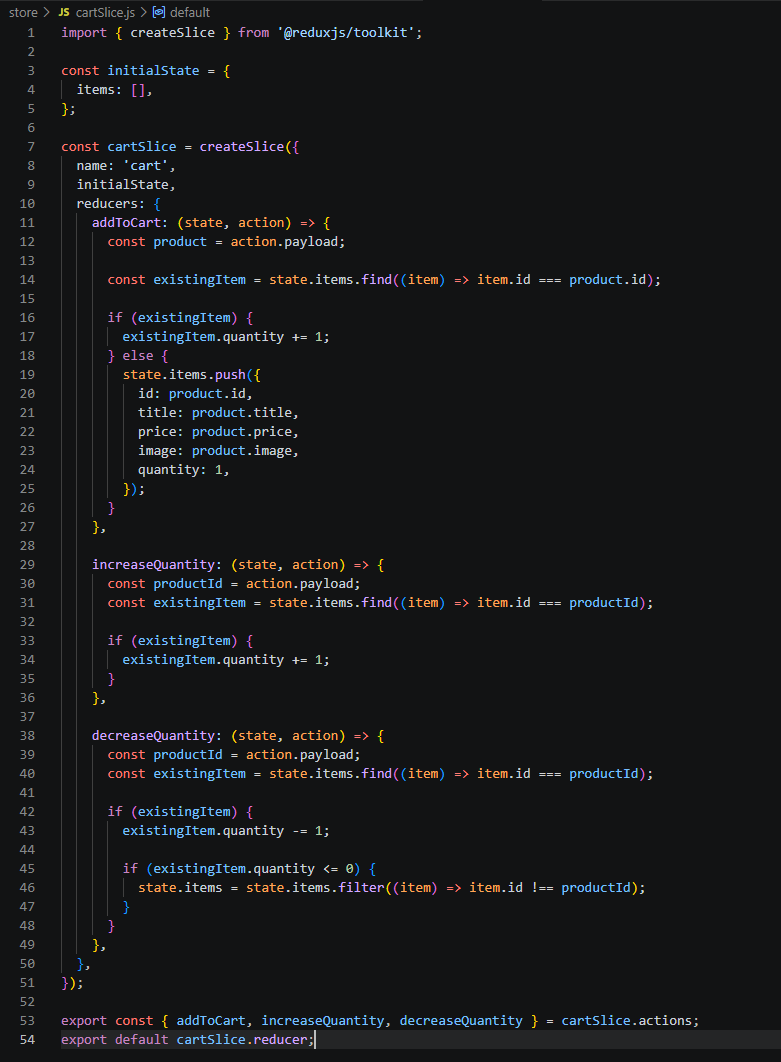
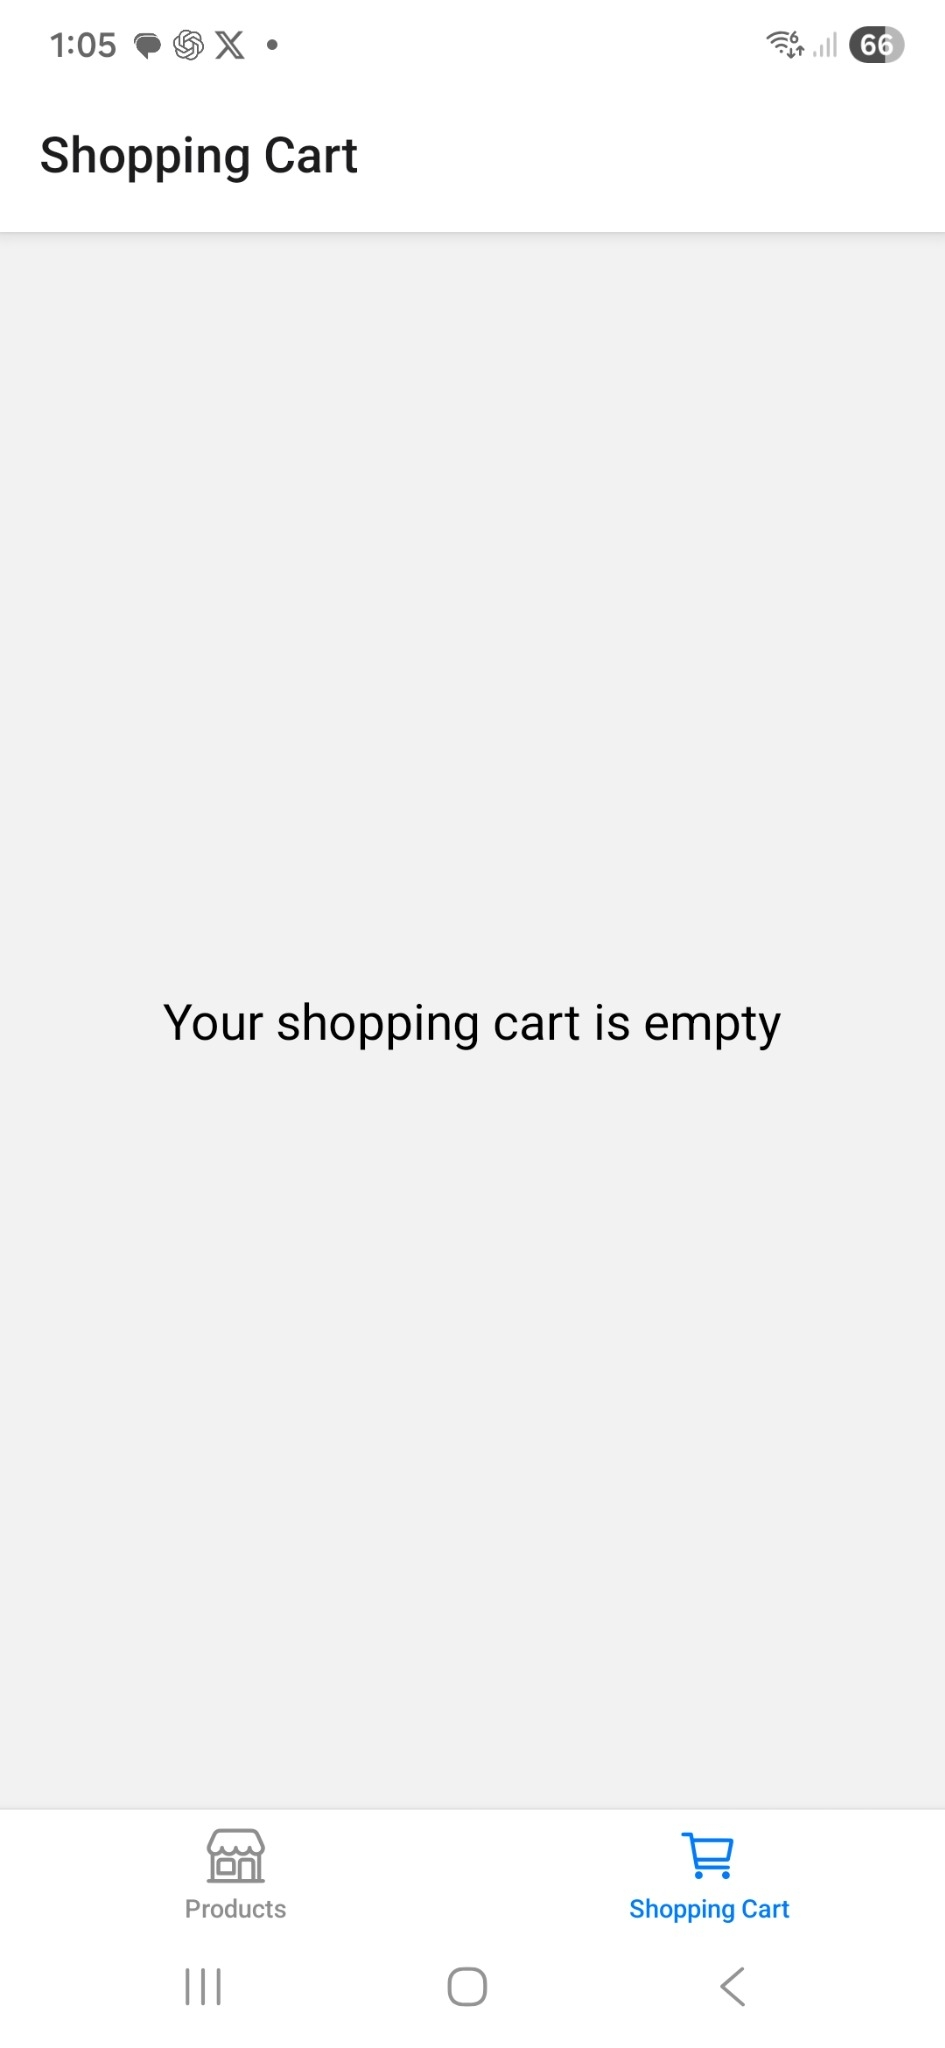
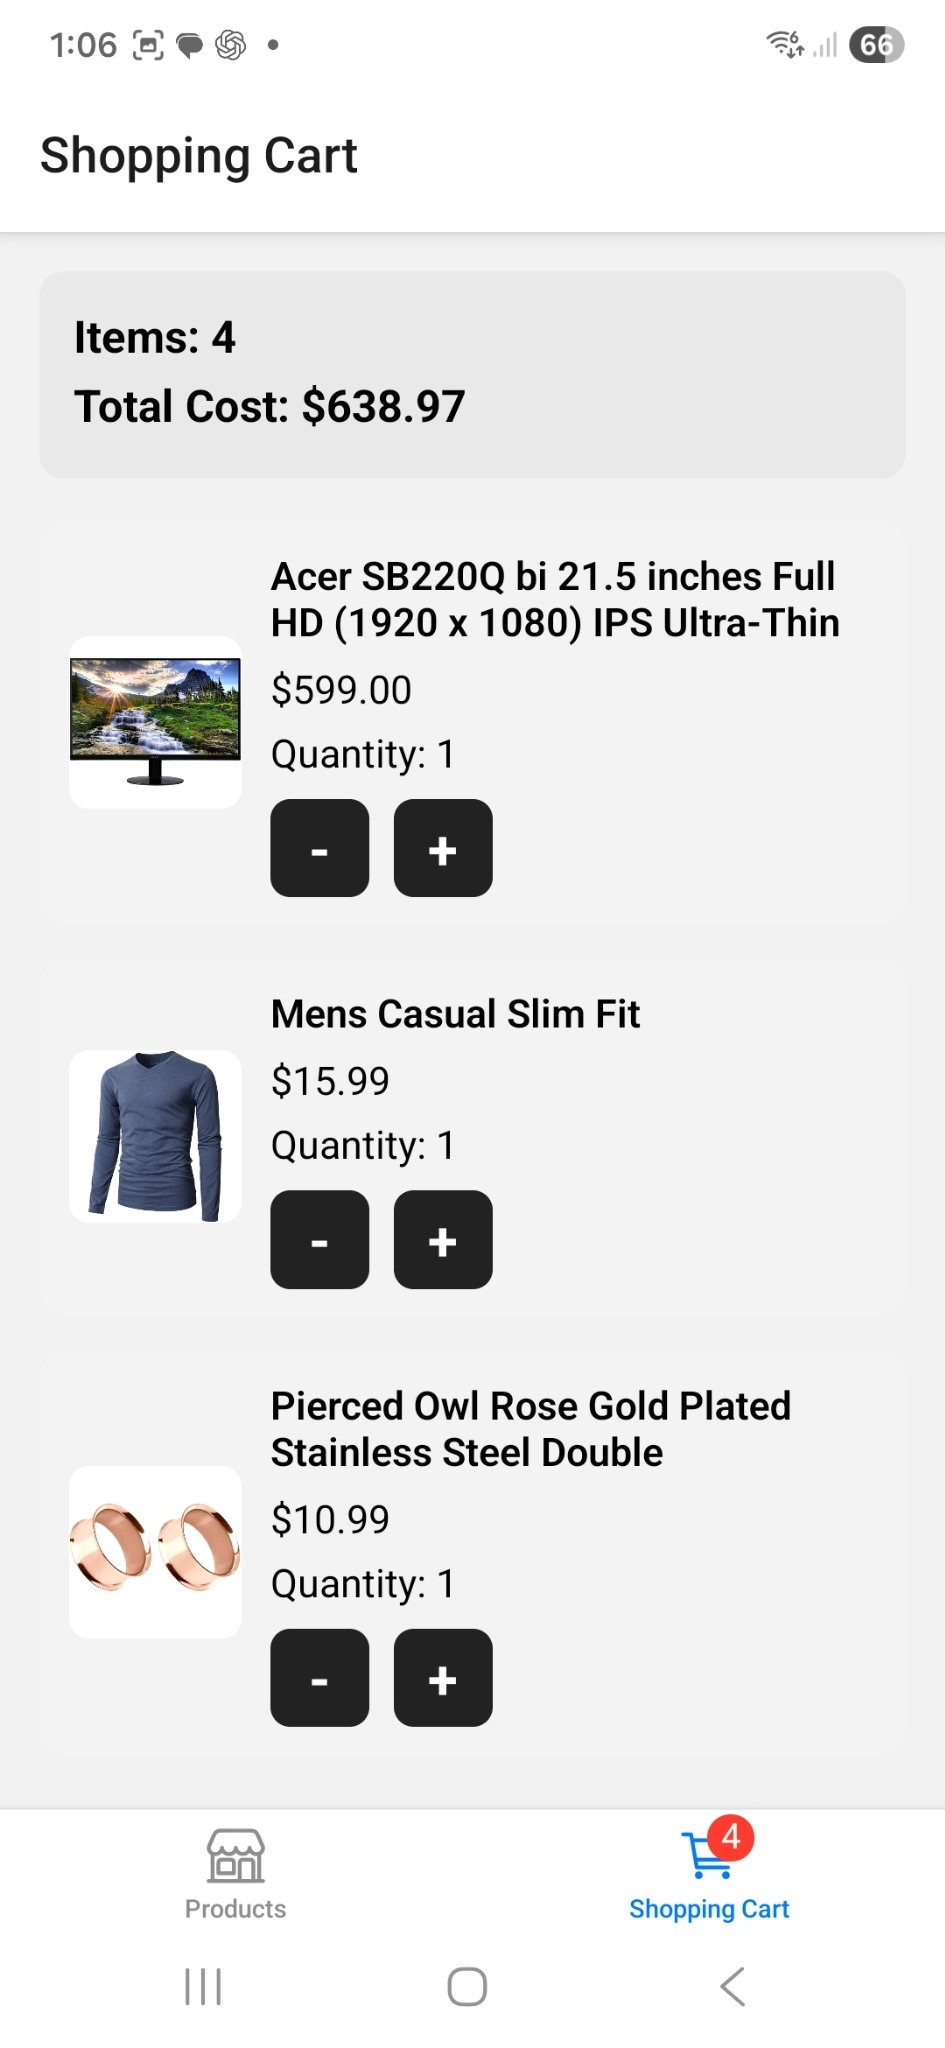
- Redux Toolkit cart slice with add, increase, decrease, and removal behaviour.
- Cart summary showing total item count and total cost.
API, navigation, and Redux flow
The product flow used category selection to fetch the matching products, then product selection to load detail data. Navigation parameters connected the screens so the selected category and product ID controlled what the next screen displayed.
The cart needed to be available from multiple parts of the app, so Redux Toolkit was used instead of passing state through several layers of screens. Adding a product increased quantity if it already existed in the cart; decreasing quantity to zero removed it.
My main implementation decision was to separate browsing state from cart state. Navigation parameters worked well for temporary screen context, such as which category or product was selected. Redux was better for cart state because the cart had to survive movement between screens and update badges, totals, and quantity controls from one shared source.
Fake Store screenshots
Browsing, product detail, cart state, and Redux evidence.

What I learned
State management choices matter.
The biggest improvement in my understanding came from seeing when different state management approaches make sense. The Todo app worked well with lifted state because the data flow was simple. The Fake Store app needed Redux because cart data had to be shared across different parts of the app.
I also learned that user feedback is part of the technical build. Validation alerts, loading indicators, empty cart states, and persisted data all make the app feel more reliable. Before this coursework, I thought mostly in terms of screens and components; afterwards I had a clearer understanding of flows, state ownership, and what should happen when data is missing, loading, saved, or changed.
- Structuring React Native apps across multiple screens.
- Passing data through navigation parameters.
- Fetching and rendering remote API data.
- Persisting data locally with AsyncStorage.
- Using Redux Toolkit for shared state.
- Testing mobile behaviour in an emulator.
- Using GitHub commit history as development evidence.
Future improvements
What I would build next.
My Todo List: editing, due dates, priority levels, search, filtering, better empty states, swipe gestures, and tests for todo actions.
Fake Store: persistent cart storage, product search and filters, layout polish, checkout confirmation screens, accessibility labels, and Redux reducer tests.